NGINX is one of the most powerful web servers when it comes to performance. According to Netcraft's survey, NGINX is used by 35.0% of all the websites on the internet.
Don't be confused with the pronunciation it's not "en-jingks", it's “engine-ex” 😁.
In this guide, I am going to install NGINX on Ubuntu 21.04.
There are two ways to install the NGINX web server on Ubuntu 21.04.
- From Ubuntu's package manager
- From the source code of NGINX
Prerequisites
Before moving further, you need to have Ubuntu installed on your server or computer ( obviously ). I am going to use DigitalOcean for this.
First, let's install NGINX from ubuntu's package manager ( apt ).
Method 1 - Install NGINX with a ubuntu package manager
Before I start, however, note that while this is a quick and easy solution, it also gives a very limited control. it doesn't allow us to add any extra modules or functionality to NGINX. This means if you want full control of NGINX, it's almost never going to be the best solution to install NGINX with the package manager. but still good for just starting.
Let's start
Log in to your web server by using SSH in your terminal.
ssh root@139.59.29.134And Now update the Ubuntu’s package manager. Just good practice to make sure we have all the latest version of the available packages
sudo apt updateAnd now with all the packages being up to date, we can install NGINX by using this command.
sudo apt install nginxThis will ask you to continue. Now Press Y and Enter for yes.
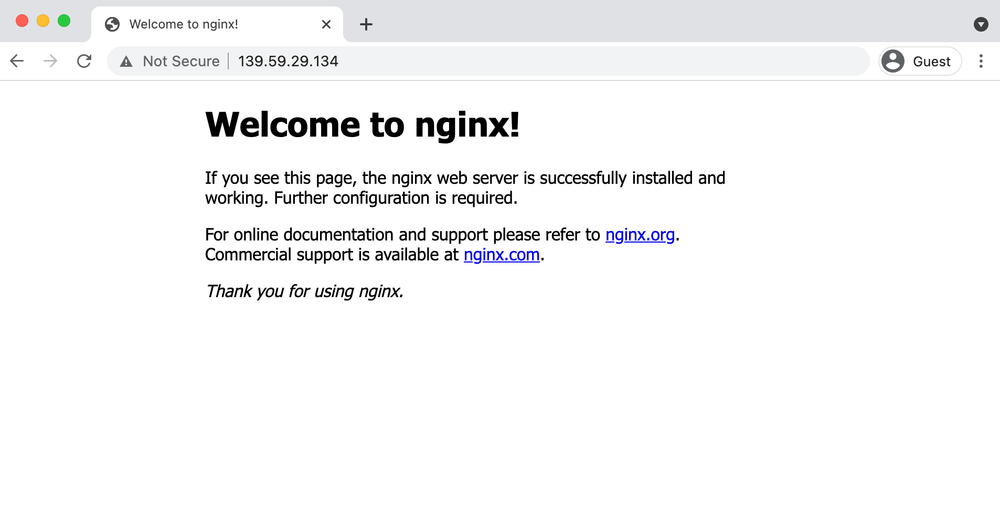
All done! with this particular package, NGINX is not only installed but also running on your server, you can confirm this by visiting your public IP.
http://139.59.29.134

or you can also use this command to make sure NGINX is installed on your server.
nginx -VYou will be able to get this output along with some configuration paths.
nginx version: nginx/1.18.0 (Ubuntu)
built with OpenSSL 1.1.1j 16 Feb 2021
TLS SNI support enabled
configure arguments: --with-cc-opt='-g -O2 -ffile-prefix-map=/build/nginx-DUpigx/nginx-1.18.0=. -flto=auto -ffat-lto-objects -fstack-protector-strong -Wformat -Werror=format-security -fPIC -Wdate-time -D_FORTIFY_SOURCE=2' --with-ld-opt='-Wl,-Bsymbolic-functions -flto=auto -Wl,-z,relro -Wl,-z,now -fPIC' --prefix=/usr/share/nginx --conf-path=/etc/nginx/nginx.conf --http-log-path=/var/log/nginx/access.log --error-log-path=/var/log/nginx/error.log --lock-path=/var/lock/nginx.lock --pid-path=/run/nginx.pid --modules-path=/usr/lib/nginx/modules --http-client-body-temp-path=/var/lib/nginx/body --http-fastcgi-temp-path=/var/lib/nginx/fastcgi --http-proxy-temp-path=/var/lib/nginx/proxy --http-scgi-temp-path=/var/lib/nginx/scgi --http-uwsgi-temp-path=/var/lib/nginx/uwsgi --with-compat --with-debug --with-pcre-jit --with-http_ssl_module --with-http_stub_status_module --with-http_realip_module --with-http_auth_request_module --with-http_v2_module --with-http_dav_module --with-http_slice_module --with-threads --add-dynamic-module=/build/nginx-DUpigx/nginx-1.18.0/debian/modules/http-geoip2 --with-http_addition_module --with-http_gunzip_module --with-http_gzip_static_module --with-http_sub_modulewill be seeing
Method 2 - Install NGINX from Source
This is the preferred method of installing NGINX.
Now let's see how we can build NGINX from source code.
First, update the package manager of ubuntu this time not to install NGINX, but rather to install a couple of dependencies we'll need to compile NGINX source code.
sudo apt updateWith our packages updated, the next step is to install some development libraries along with the source code compiler.
sudo apt-get install build-essential libpcre3 libpcre3-dev zlib1g zlib1g-dev libssl-dev libgd-dev libxml2 libxml2-dev uuid-devNow, it will ask to continue, press Y and Enter for yes.
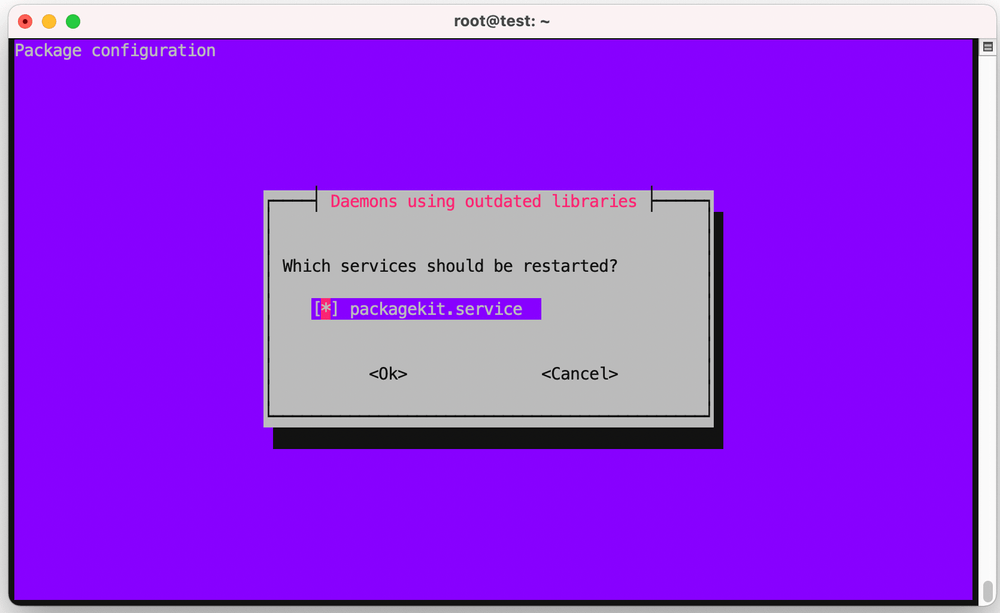
When the prompt appears, which services should be started?
Press Enter for packagekit.service

It will take some time to install all the required dependencies to compile NGINX source code.
Next, you have to download the NGINX source code from the official NGINX website.
You can download the latest source code by using this command.
sudo wget http://nginx.org/download/nginx-1.21.0.tar.gzAnd now extract this tarball file by using this command.
sudo tar -zxvf nginx-1.21.0.tar.gzNow navigate to the extracted directory by using the following command.
cd nginx-1.21.0Next, you have to configure the paths for everything for example - access, and the Error Log path along with some custom flags like --with-http_v2_module for HTTP version 2.
But of course, the absolute main benefit of building NGINX from the source is the ability to add custom modules or essentially extend the standard NGINX functionality, something you cannot do using a package manager.
There are many custom flags available on the official NGINX website's Documentation page. You can use whatever you need.
For now, I am going to use the following configuration as this is the generally used configuration. you can use the same as well.
./configure --prefix=/var/www/html --sbin-path=/usr/sbin/nginx --conf-path=/etc/nginx/nginx.conf --http-log-path=/var/log/nginx/access.log --error-log-path=/var/log/nginx/error.log --with-pcre --lock-path=/var/lock/nginx.lock --pid-path=/var/run/nginx.pid --with-http_ssl_module --with-http_image_filter_module=dynamic --modules-path=/etc/nginx/modules --with-http_v2_module --with-stream=dynamic --with-http_addition_module --with-http_mp4_moduleNow, we are ready to compile NGINX source code, you can also do that by using this command.
sudo make Note that this will take some time to compile the NGINX source code.
And now use this command to install the compiled source code.
sudo make installTo make sure you have successfully installed NGINX on your server use this command.
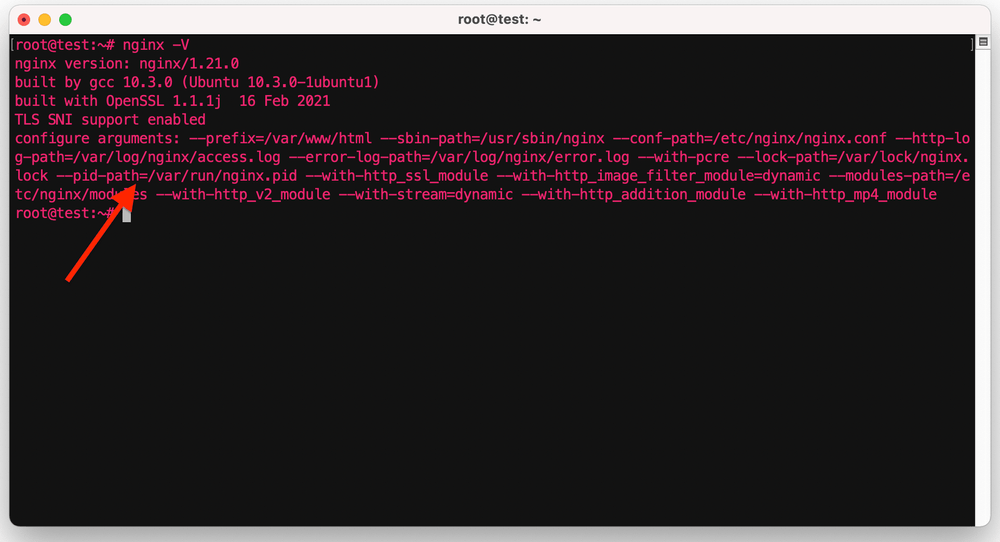
nginx -VThis tells us nginx1.21.0 is installed with a breakdown of the configuration used to install it.
nginx version: nginx/1.21.0
built by gcc 10.3.0 (Ubuntu 10.3.0-1ubuntu1)
built with OpenSSL 1.1.1j 16 Feb 2021
TLS SNI support enabled
configure arguments: --prefix=/var/www/html --sbin-path=/usr/sbin/nginx --conf-path=/etc/nginx/nginx.conf --http-log-path=/var/log/nginx/access.log --error-log-path=/var/log/nginx/error.log --with-pcre --lock-path=/var/lock/nginx.lock --pid-path=/var/run/nginx.pid --with-http_ssl_module --with-http_image_filter_module=dynamic --modules-path=/etc/nginx/modules --with-http_v2_module --with-stream=dynamic --with-http_addition_module --with-http_mp4_module
We can now start NGINX by simply running this command.
nginxNow we have successfully NGINX installed and running on Ubuntu 21.04. you can also check this by visiting your public IP address.
http://206.189.143.127Optional - Adding Systemd Service to Manage NGINX
To manage your NGINX web server you need to add a system service more specifically will be adding NGINX as a Systemd service as this is the newer and more popular standard for managing the services.
For adding NGINX as a Systemd service you need to create a systemd unit file and add a small script.
First, create a systemd unit file by using this command. (this will be open in nano editor)
sudo nano /lib/systemd/system/nginx.serviceand now copy and paste this script.
[Unit]
Description=The NGINX HTTP and reverse proxy server
After=syslog.target network-online.target remote-fs.target nss-lookup.target
Wants=network-online.target

[Service]
Type=forking
PIDFile=/var/run/nginx.pid
ExecStartPre=/usr/sbin/nginx -t
ExecStart=/usr/sbin/nginx
ExecReload=/usr/sbin/nginx -s reload
ExecStop=/bin/kill -s QUIT $MAINPID
PrivateTmp=true

[Install]
WantedBy=multi-user.target
You can change the PIDfile location and ExecStartPre (NGINX executable file location) as per your custom configuration location more specifically your custom PIDfile path.
You can find your PIDfile path and ExecStartPre by using this command
nginx -VYou will see the PIDfile path location in the custom path configuration.

And now save this file by pressing CTRL+X, Y and Enter
First, stop the NGINX by using standard command line
sudo nginx -s stop You can now manage your NGINX web server by using Systemd for example - restart your NGINX web server by using systemd.
sudo systemctl restart nginxYou can also check the status of the NGINX web server whether it is running or not by using the following command.
sudo systemctl status nginxEnable NGINX web server on boot
By default, it is enabled if you installed NGINX via ubuntu's package manager but if you build NGINX from the source, you have to enable it with systemd.
To enable NGINX on boot run this command
sudo systemctl enable nginxIt will create a symlink for nginx.service.
You can now test this by rebooting your machine.
You can reboot your ubuntu machine using this command.
sudo rebootAfter rebooting your machine successfully, you can now visit your Public IP address to see your NGINX up and running on port 80.
Conclusion
By following this guide, You installed NGINX on Ubuntu 21.04. If you want to secure your nginx with a SSL certificate you can follow this guide - How to Install Free SSL Certificate on NGINX
Congrats we are at the end of this post. I hope you enjoyed the topic. If you have any questions regarding this please let me know in the comment section.
